Learn how to execute flash loan | Aave v3 | 15mins | Simulate on Mainnet

What Is a Flash Loan?
In traditional finance, a borrower must deposit collateral and pass credit checks before receiving a loan. However, with Defi, borrowers can access loans without providing collateral. This lending option is called a flash loan.
A flash loan is an uncollateralized, short-term loan available in the DeFi space. Flash loans are usually high-risk activities that allow users to borrow crypto with no upfront collateral. These loans are executed using smart contracts and are available for a very short time.
If you what to learn more about flashloan read this article learn-how-to-perform-flashloan-using-aave
So, without further a do, let us begin.
Step 1: Develop the Smart Contract
1.1. We are going to develop a simple smart contract that will borrow USDC from the Aave Protocol and then repay it along with the premium required (that is to say the commission).
1.2. Following is the sample contract that we will be going through (available over here 👉 GitHub Link):
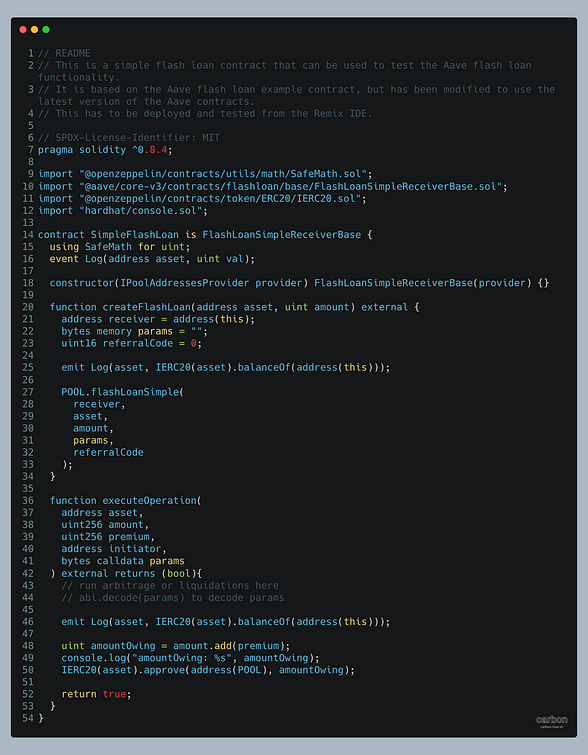
1.3. Diving into the code:
createFlashLoan() function:
This function is used to initiate a flash loan.
It takes in the address of the asset that is to be borrowed and the amount to be borrowed as parameters. In our example, we will be using
USDC(0x2791Bca1f2de4661ED88A30C99A7a9449Aa84174)The receiver address is set to the current contract address using
address(this)since we will want the borrowed funds to be sent to the address of the contract that we will just deploy and then repay our loan from the same contractThe function also creates an empty bytes memory variable called “params” which can be used to store additional data. This data is passed back to the
address(this)for further execution. In a complicated transaction, this data is passed as a parameter to thecreateFlashLoanfunctionIt sets the referral code to 0, as there is no middleman for the execution of this transaction.
It then calls the POOL contract’s
flashLoanSimplefunction with the receiver address, asset address, amount, params, and referral code as the parameters.
executeOperation() function:
This function is called by the Aave protocol when a flash loan has been initiated.
It takes in several parameters: the asset address, amount requested to borrow, premium (fees to be paid back for borrowing), initiator (address that executed the flash loan), and any additional data stored in the “params” variable.
Step 2: Getting up the infra needed to deploy and test our smart contract
Now as per the “set” practices, you would be expected to deploy the above contract on either a local blockchain node (eg: Hardhat or Truffle) or a public Testnet like Goreli Testnet. While that is okay, except for the following pain points:
In relation to the Goreli Testnet:
It is not the Polygon Mainnet 😞 which means it does not have the same state of tokens or for that matter the most important ‼️ Aave Network’s state, as I would need so that I can be sure that my contract will work exactly in the same manner on the Polygon Mainnet
Faucet: Need I explain more? 😤
Where can I get the USDC for me to be able to pay back the commission? 🤔
In relation to the local node:
Mainnet fork: Check ✅
Faucet: Check ✅
Getting USDC: For me to be able to pay the commission, we will have to write the additional script of impersonating an account (”the Rich Man”) and then get some USDC to be able to pay back the commission. 😕
Debug my contract with ease: Sadly not with ease (yes, I could use some console. logs, but largely that is about it). 😢
Share the state of my transaction with my friends/mentor to get some feedback: Well, it's called
localhostfor a reason! So forget about it. 😭
2.1. That is where BuildBear comes in. It kind-a marries the benefits of both the world for you:
Mainnet fork: Check ✅
Faucet: Check ✅
USDC (ERC20 Token Faucet): Check ✅
Debugging my transaction: Check ✅ [comes with an in-built transaction tracer]
Share the state of my transaction with my friends/mentor to get some feedback: Check ✅. It is a private testnet for a team, hence, I have the ability to invite my friends/mentors to my own testnet and review my transaction
Have a look over here: Where Localhost Fails and Win Web3 Hackathons, using BuildBear Testnet’s analytics
2.2. Visit the BuildBear App. Once you login with your Github or Google Account, you will see a page similar to the image added below:
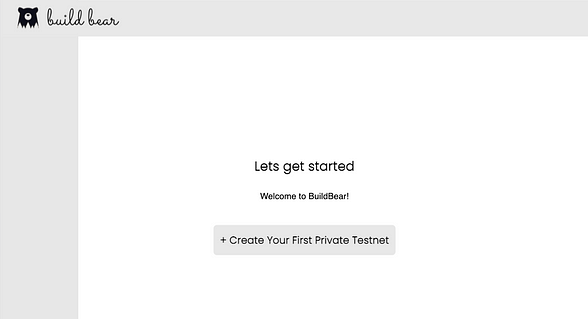
BuildBear dashboard
2.3. Create your private node forking from the Polygon Mainnet: The reason to choose Polygon Mainnet is that AaveV3 (at the time of writing this article) is not deployed on the Ethereum Mainnet.
As per the latest Governance vote by the Aave Community, AaveV3 will be deployed on the Ethereum Mainnet as well

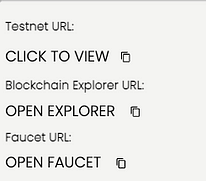
2.4. Add your private testnet to your MetaMask wallet by using the “Add to Metamask” button:

2.5. Mint your Native and USDC from the Faucet (using the Faucet URL):
2.5.1. Minting the Tokens

Step 3: Deploying the Smart Contract
3.1. Navigate to the Remix Online IDE website and accept the terms and conditions.

Remix
3.2. Create a new contract and paste the Smart Contract Code, available over here 👉 GitHub Link
3.3. Compile the Smart Contract, with Solidity Version 0.8.10, by using the following icon and details:

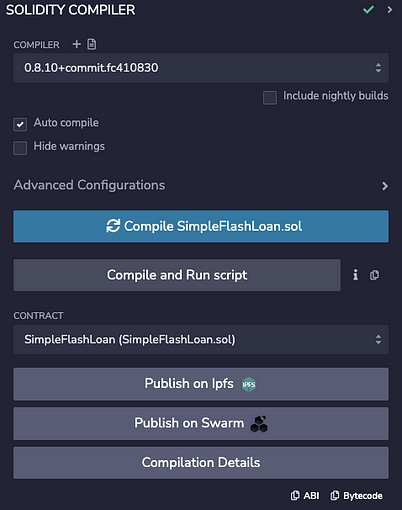
Please note that the ABI of the Contract is available only once the Contract is compiled. You can see in the above image the ABI which can be copied. Please keep this handy. We will need it momentarily.
3.4. Select the “Deploy and Run Transactions” tab: and deploy the contract as follows:
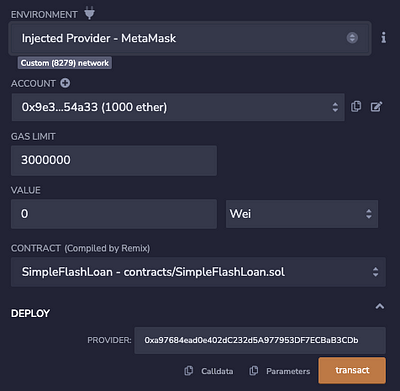
Make sure that you update the Environment to “Injected provider — MetaMask” | CRITICAL,
the Contract is “SimpleFlashLoan”, and
the Provider (in the Deploy field) is
0xa97684ead0e402dC232d5A977953DF7ECBaB3CDb
3.5. Click on the “transact” button to deploy the contract to your private node network; once done, you will see something similar to the following:

3.6. Copy the address of the Contract and visit the Blockchain Explorer for your personal forked testnet (link available on the dashboard page at home.buildbear.io) and locate your contract.
3.6.1. Submitting the ABI of the contract for ease of interaction
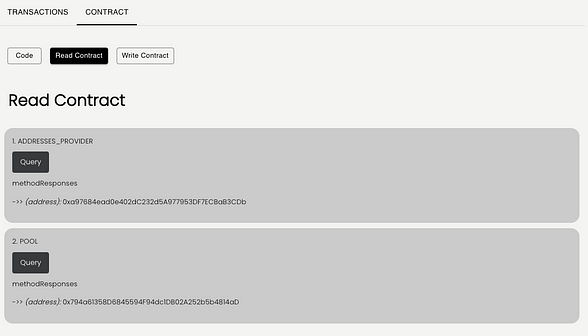
You can visit your contract page on BuildBear’s Blockchain Explorer and then visit the Contract tab. You should see something similar to the following:

Submit the ABI that we copied from Step 3.3; once done, you should see the Read and Write Contract buttons made available to you on the Contract Page:
Step 4: Take a Flash Loan and then repay it back with the commission
6.1. Visit the Write Contract tab and connect your wallet:

6.2. You MUST ONLY call the createFlashLoan

6.3. Enter the token address you want to borrow (make sure that this token is listed on Aave) and the amount you want to borrow in the “Arguments” field of createFlashLoan. Since we minted USDC from the Faucet, we will use the USDC Address and borrow 10,000,000.000000 [Ten Million] (Please note, USDC has 6 decimals and hence be mindful of the number of Zeros)

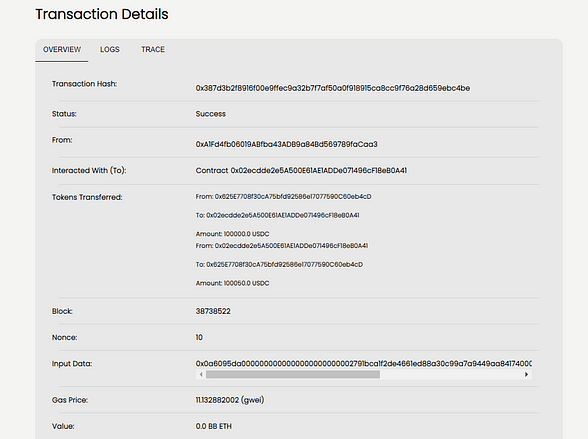
6.3. Upon clicking the button, MetaMask should appear, prompting you to approve the transaction. After confirming the transaction, you should see a success message. To verify the transaction on the blockchain, go to your Buildbear dashboard and click on “Open Explorer.” From there, click on “Show all transactions” and you should see your transaction listed.
Conclusion
We were successfully able to write the smart contract for a Flash Loan! We were able to borrow USDC from the pool, pay the Flash Loan fee, and then repay the borrowed amount all in a single transaction. You just borrowed money with no collateral!
This only took around 15 mins
If you appreciate what we are doing, please follow us on Twitter, LinkedIn and Join the Telegram group if you haven’t done yet.
And please give us a clap 👏 if you like our work.
Create your Private and Customized Testnet with BuildBear


