Learn and deploy an ERC 1155 smart contract (Most used by web3 Games).

Before Developing the ERC1155 smart contract let’s have an In-Depth Look at ERC1155 and Its Applications
First Let’s look at ERC, tokens, and NFTs to understand the need for ERC1155
“ERC” stands for Ethereum Request for Comments. It is a type of EIP focused on standards for Ethereum applications, a category that includes tokens.
Tokens?
Tokens are transferable units of value. Colloquially they are referred to as cryptocurrencies or (technically incorrectly) coins. Tokens generally fall into one of two buckets: fungible or non-fungible. Fungible tokens are mutually interchangeable, like dollar bills or pesos. Non-fungible tokens are unique and noninterchangeable, like a painting or book.
NFTs?
Non-fungible tokens, or NFTs, are digital assets that are provably unique. They can be used to represent both tangible and intangible items.
Why do we need ERC-1155?
Prior to ERC-1155, the two predominant token standards were ERC-20 for fungible tokens and ERC-721 for non-fungible tokens. They could not (and cannot) be wrapped into the same smart contract. This limitation meant that if someone wanted to transfer, say, USDC (ERC-20) and a CryptoKitties NFT (ERC-721), they would need to execute multiple transactions, which was inefficient and expensive.
ERC-1155 solves this by combining the two token standards. ERC-1155 is a token standard that enables the efficient transfer of fungible and non-fungible tokens in a single transaction. Witek Radomski, Andrew Cooke, Philippe Castonguay, James Therien, Eric Binet, and Ronan Sandford proposed the new standard in June 2018 with EIP-1155.
What’s so special about ERC-1155?
As well as allowing for the transfer of multiple token types at once, and the attendant gains in efficiency and lower transaction costs, ERC-1155 has a number of other special characteristics:
It supports an infinite number of tokens, in contrast with ERC-20 and ERC-721, which require a new smart contract for each type of token.
It supports not only fungible and non-fungible tokens but also semi-fungible tokens. Semi-fungible tokens are like general admission concert tickets. They are interchangeable and can be sold for money before the show (fungible). But after the show, they lose their pre-show value and become collectibles (non-fungible).
It has a safe transfer function that allows tokens to be reclaimed if they are sent to the wrong address, unlike ERC-20 and ERC-1155
It removes the need to “approve” individual token contracts separately, which means signing fewer transactions
If you’re interested in understanding how ERC-1155 works at a technical level, check out EIP-1155.
Application of ERC-1155?
🎮 Enjin — Enjin offers a number of blockchain products, many of which implement ERC-1155.
🕹️ Horizon — Horizon is a blockchain games company whose Skyweaver game uses ERC-1155.
🖼️ OpenSea — The NFT marketplace’s ERC-1155 implementation allows multiple creators per smart contract but only one creator is able to mint more copies.
We have learned the required information
Now let’s create 3 NFT collections (rock, paper, and scissors) using ERC1155.
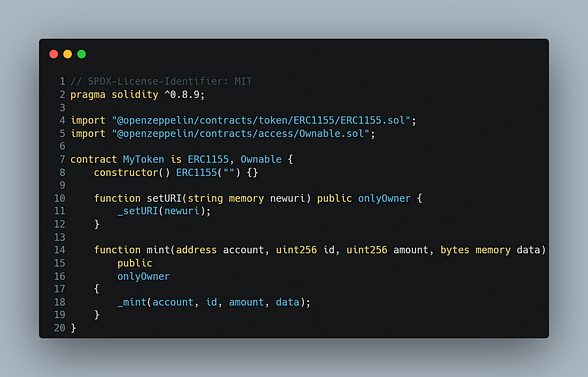
Step 1: Developing the ERC1155 Smart Contract
Line 1: Specifying SPDX license type, which is added after Solidity ^0.8.9. Whenever the source code of a smart contract is made available to the public, these licenses can help resolve/avoid copyright issues. If you do not wish to specify any license type, you can use a special value UNLICENSED or simply skip the whole comment (it will not result in an error, just a warning).
Line 2: Declaring the Solidity version.
Line 4–5: We have used the standard contracts provided to us by openzeppelin; once you get full-time dev into Smart Contracts, you will realize Open Zeppelin Contracts are God Sent.
Lines 6–9: Creating our contract named MyToken.
Lines 10–12: SetUri allows us to change the Metadata Uri of our NFTs and tokens
Line 14–20: “mint” Function allows us to mint Tokens and NFTs
Compile the contract, go to the third tab on the left menu, select Injected Web3 as environment, and deploy it by choosing the proper contract name:
Step 2: Getting up the infra needed to deploy and test our smart contract
Now as per the “set” practices, you would be expected to deploy the above contract on either a local blockchain node (eg: Hardhat or Truffle) or a public testnet like Goreli Testnet. While that is okay, except for the following pain points:
In relation to the Goreli Testnet:
- Faucet: Need I explain more? 😤
In relation to the local node:
Faucet: Check ✅
Debug my contract with ease: Sadly not with ease (yes, I could use some console.logs, but largely that is about it). 😢
Share the state of my transaction with my friends/mentor to get some feedback: Well, it’s called
localhostfor a reason! So forget about it. 😭
2.1. That is where BuildBear comes in. It kind-a marries the benefits of both the world for you:
Faucet: Check ✅
Debugging my transaction: Check ✅ [comes with an in-built transaction tracer]
Share the state of my transaction with my friends/mentor to get some feedback: Check. It is a private testnet for a team, hence, I have the ability to invite my friends/mentors to my own testnet and review my transaction
Have a look over here: **Where Localhost Fails and *Win Web3 Hackathons, using BuildBear Testnet’s analytics
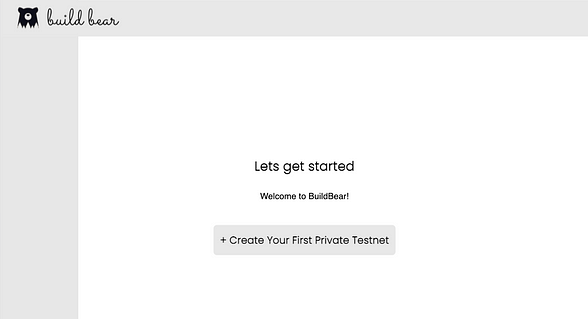
2.2. Visit the BuildBear App. Once you login with your Github or Google Account, you will see a page similar to the image added below:
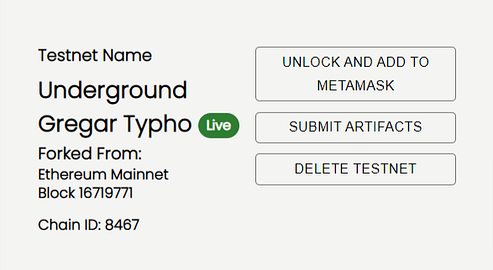
2.3. Create your private node forking from the Ethereum Mainnet:

2.4. Add your private testnet to your MetaMask wallet by using the “Unlock and Add to Metamask” button:
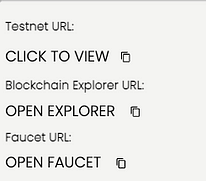
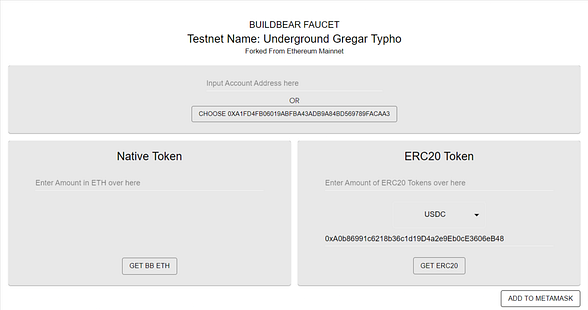
2.5. Mint your Eth tokens from the Faucet (using the Faucet URL):
2.5.1. Minting the Tokens
Step 3: Deploying the Smart Contract
3.1. Navigate to the Remix Online IDE website and accept the terms and conditions.
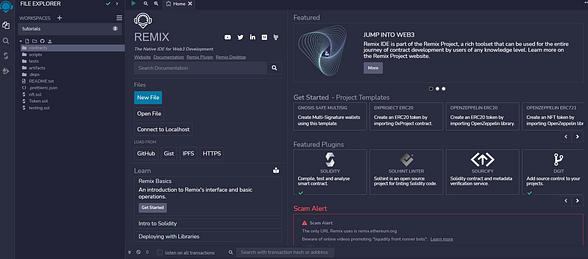
3.2. Create a new contract and paste the Smart Contract Code, available over here 👉 GitHub Link
3.3. Compile the Smart Contract, with Solidity Version 0.8.19, by using the following details:
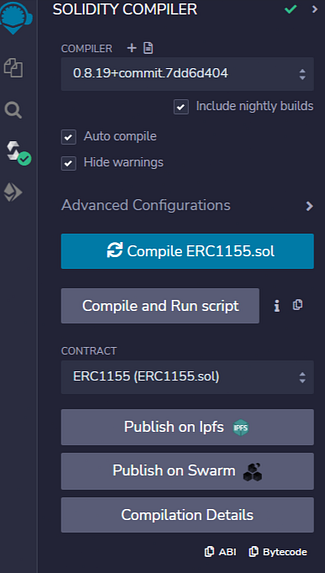
Please note that the ABI of the Contract is available only once the Contract is compiled. You can see in the above image the ABI which can be copied. Please keep this handy. We will need it momentarily.
3.4. Select the “Deploy and Run Transactions” tab: and deploy the contract as follows:
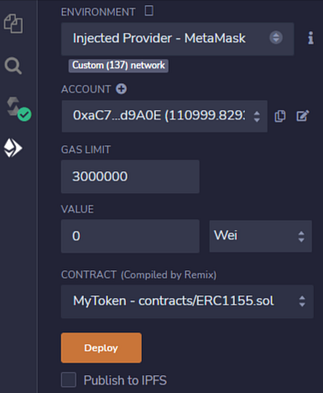
- Make sure that you update the Environment to “Injected provider — MetaMask” | CRITICAL,
3.5. Click on the “transact” button to deploy the contract to your private node network; once done, you will see something similar to the following:
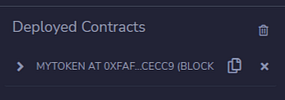
3.6. Copy the address of the Contract and visit the Blockchain Explorer for your personal forked testnet (link available on the dashboard page at home.buildbear.io) and locate your contract.
3.6.1. Submitting the ABI of the contract for ease of interaction
You can visit your contract page on BuildBear’s Blockchain Explorer and then visit the Contract tab. You should see something similar to the following:
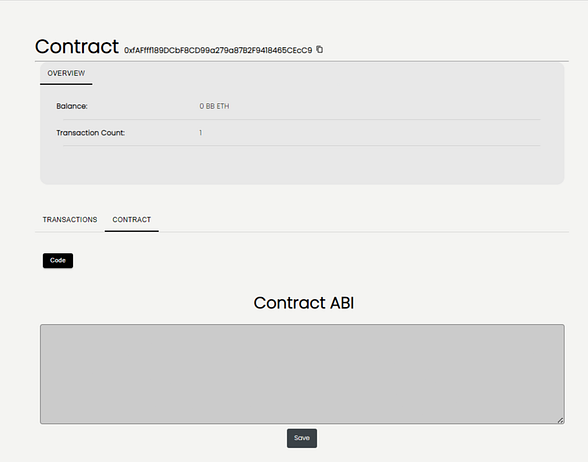
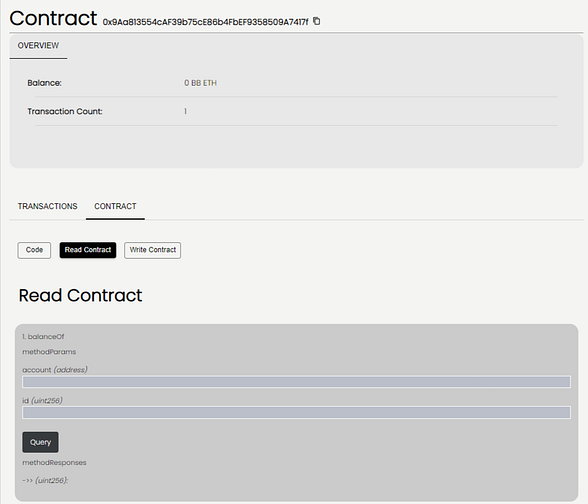
Submit the ABI that we copied from Step 3.3; once done, you should see the Read and Write Contract buttons made available to you on the Contract Page:
We have successfully built and deployed ERC1155 smart contract !!! 🎉🎉🎉
Step 4: Let’s mint NFt and Tokens.
First Let’s Nft and token Metadata to IPFS
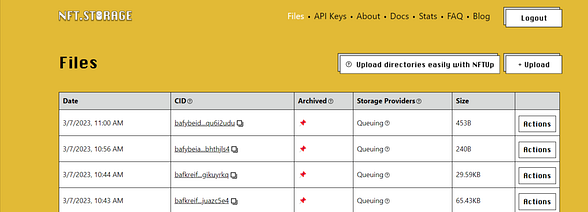
To upload our files to the decentralized storage IPFS, we can upload them through CLI or use this very easy-to-use tool NFT Storage.
We will be using the second option, NFT Storage. Sign in to NFT Storage and upload your image files for Token and NFT. You should see something like this once they’ve been uploaded successfully:
We will create three JSON metadata files to store information about our NFT collections.
1.json: NFT collection
2.json: Token collection
Use https://jsoneditoronline.org/ to create the JSON files
Our 1.json file will look something like this:
{ //1.
    "name": "BuidBear",
    "description": "BuildBear NFTs.",
    "image": "https://ipfs.io/ipfs/bafkreifvhjdf6ve4jfv6qytqtux5nd4nwnelioeiqx5x2ez5yrgrzk7ypi",
}
name: Has the name of the NFT.
description: Has the description of the NFT.
image: Has the link to the image we got earlier (IPFS URL).
If a collection has multiple images, which is usually the case, an extra parameter id is added to differentiate tokens amongst the collection.
Create the remaining JSON files, 2.json for Token.
To efficiently upload all the JSON files to IPFS, we will archive them in content-addressed format. https://car.ipfs.io/ helps archive files in IPFS-compatible content-addressed archive (.car) format.
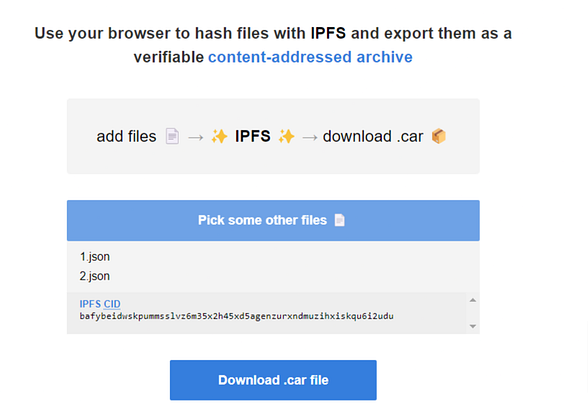
Head over to IPFS CAR and upload all 2 JSON files. Once uploaded, download the .car file and upload it to NFT Storage. All our JSON files are now stored on IPFS in an archived manner. Copy the IPFS URL of the uploaded .car file, and you should be able to access JSON files by just entering the file name at the end of the URL, for example:
https://ipfs.io/ipfs/bafybeihjjkwdrxxjnuwevlqtqmh3iegcadc32sio4wmo7bv2gbf34qs34a/2.json
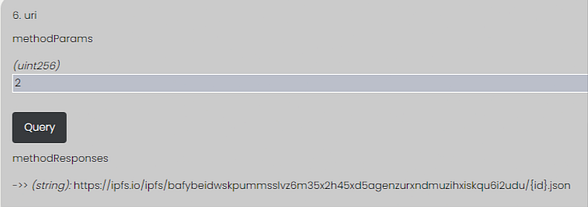
Set the IPFS URI
call the SetURI function with the IPFS link
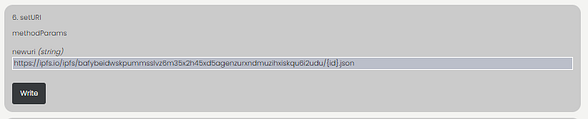
https://ipfs.io/ipfs/bafybeidwskpummsslvz6m35x2h45xd5agenzurxndmuzihxiskqu6i2udu/{id}.json
Let’s mint the NFT
Enter the receiver account, id as 1, the amount as 1, and click on write
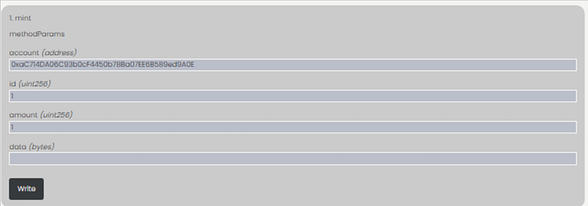
we have successfully minted our NFT 🎉🎉
Let’s MInt our Token
Enter the receiver address, id as 2, amount as many as we have wanted, and click on write.
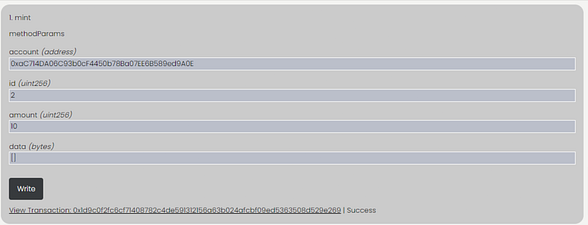
we have successfully minted our Tokens 🎉🎉
We can now move to read the contract section and check our balance, Metadata URI, and so on.
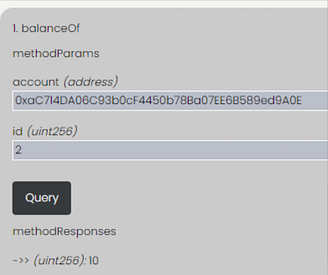
We have successfully minted NFTs and Tokens in the same contract. 🎉🎉
Share your project on Twitter and LinkedIn and tag @_BuildBear.
Read our past articles and keep learning.
1. Generate NFT with AI and Deploy the NFT smart contract, and the Front End App
2. Learn how to Create, Deploy an NFT Smart Contract and Develop a Front End App in 15mins
3. Learn how to execute flash loan | Aave v3 | 15mins | Simulate on Mainnet
If you appreciate what we are doing, please follow us on Twitter, and LinkedIn and Join the Telegram group if you haven’t done yet.
And please give us a clap 👏 if you like our work.

BTW, if you would know anyone who would be keen to work with BuildBear. Please have a look over here !!!
Authors: Chandan


