Chainlink Verifiable Random Function (VRF) is a random number generator for smart contracts. Developers can use Chainlink VRF on BuildBear Sandbox to build and test smart contracts for any decentralized applications that rely on unpredictable outcomes such as in games or lottery systems.
In this guide, you’ll learn how to request and retrieve random words for your smart contracts and dApps by seamlessly integrating Chainlink VRF into your BuildBear Sandbox.
What can you do with the BuildBear Chainlink Plugin?
The BuildBear Chainlink VRF Plugin lets you integrate Chainlink VRF into your development workflow to request and manage random numbers for your smart contracts and dApps.
The plugin’s Key Features includes:
Subscription Method: Support subscription method to manage multiple consumer contracts with a single subscription account funded with Link tokens.
Easy Integration: Use your existing Chainlink VRF Subscription or create a new one with ease.
Multi-Network Support: Supported networks include Ethereum, Sepolia, Arbitrum, Avalanche, BNB, and Polygon.
Step-by-step procedure on using the Chainlink Plugin
In this tutorial, we will use a sample consumer contract that requests random words and receives random words using Chainlink VRF. The consumer contract should be compatible with Chainlink VRF v2.5.
Through this plugin we will use our Smart Contract / dApp in a Sandbox Mode, but in the EXACT SAME manner as you would use the Smart Contract / dApp on the Mainnet and that you are NOT using any Mock Values in your script for testing.
1. Create a BuildBear sandbox.
If you are new to BuildBear, refer to our comprehensive documentation to sign up and create your sandbox here. Visit here to create a new Sandbox.
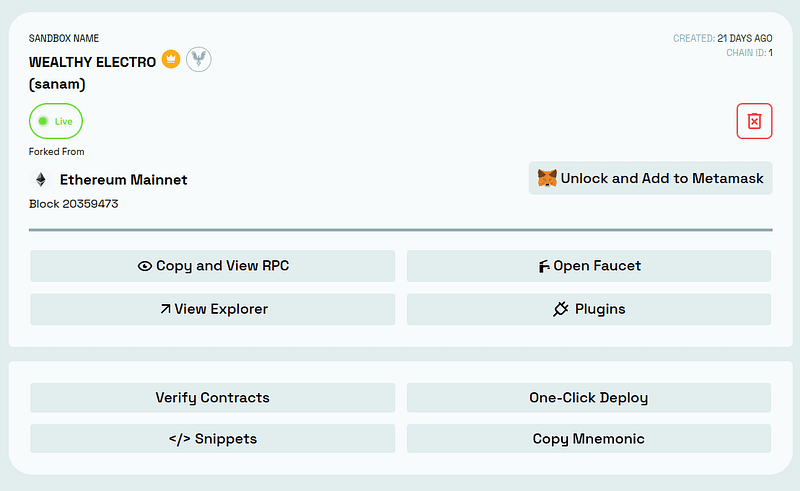
2. Install the Chainlink VRF plugin.
To install the Chainlink VRF plugin in your Sandbox, go to the dashboard, select the “Plugins” option, and choose the Chainlink VRF plugin from the available list.
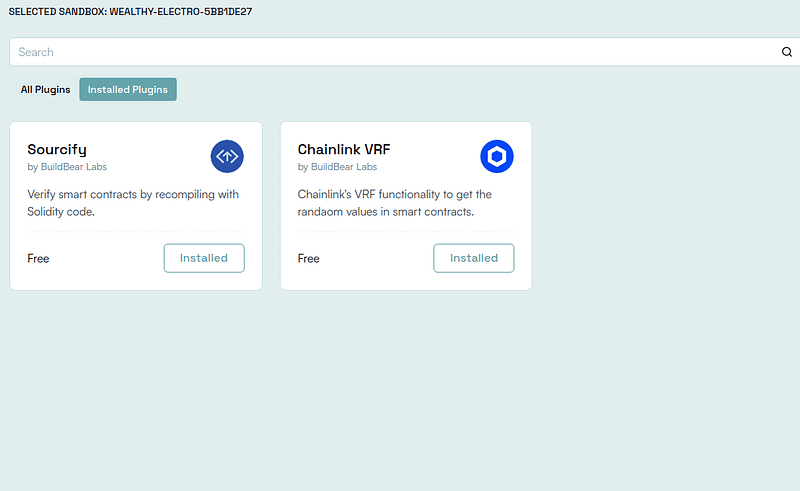
3. Subscribing to VRF and Funding the Subscription
(A) Subscribing
One can either use an existing Subscription or set up a new Subscription. BuildBear supports the Chainlink VRF Subscription method for creating a new subscription.
To create a new Subscription, call createSubscription() in the VRF Coordinator Contract in your sandbox and secure a Subscription ID. Use the script code below for this:
// Create subscription
  console.log("[Coordinator] Creating subscription...");
  const subsTx = await vrfCoordinator.connect(signer).createSubscription();
  const subRecipt = await subsTx.wait();
  console.log({ createSubTxnHash: subsTx.hash });
You can also do the same from the BuildBear Explorer by calling the createSubscription function.
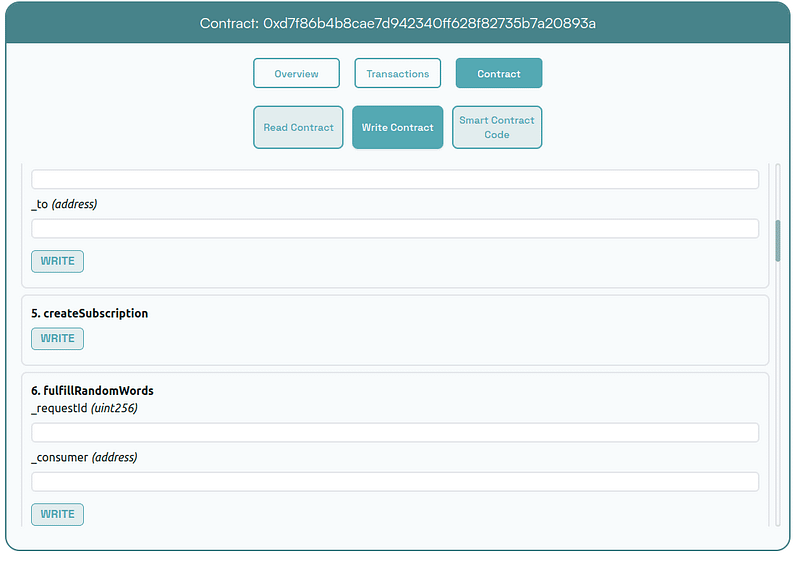
If you have an existing Chainlink VRF subscription, simply pass the subscription ID in the below script. This allows you to use the existing subscription to request random words from the consumer contract.
// Using existing subscription
  console.log("[Coordinator] Using existing subscription...");
  const subId = ""// insert your Subscription ID over here
    console.log({subId});
(B) Funding the Subscription
Before requesting random numbers from Chainlink VRF, you need to fund your subscription with LINK tokens. If the Subscription is already funded on the mainnet, then your smart contract calls will work on BuildBear Sandboxes without any modification (i.e., exactly as they would function on the mainnet). If the Subscription is NOT funded, you can fund the subscription using the LINK tokens in the exactly same manner as you would do on the mainnet. However, you can use the BuildBear Faucet to get the LINK tokens easily.
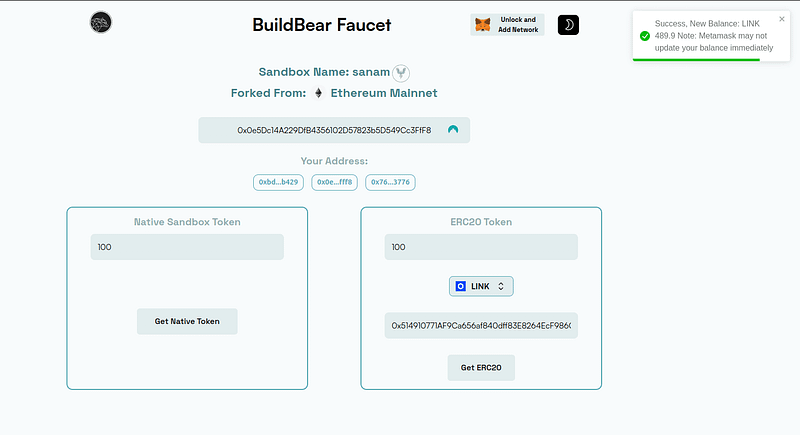
Once you have the LINK tokens on your wallet address, you have to call the transferAndCall function in the LINK Token Contract. Please note the following in relation to the parameters of the transferAndCall function:
(1) value should be in Juel, which is the smallest denomination of LINK and
(2) data must be the subscription ID (subId) encoded in ABI format.
For your ease, you can use the following script to encode your subId and fund subscription with an actual LINK:
//@ts-ignore
  const subId = // insert your Subscription ID over here
  const abiCoder = new ethers.AbiCoder();
  const encodedSubId = abiCoder.encode(["uint256"], [subId]);
  console.log({ subId, encodedSubId });

   const linkToken = await ethers.getContractAt(
    "LinkTokenInterface",
    linkTokenAddr
  );
  const value = 50;
  console.log(`Transferring ${value} LINK to subscription...`);
  const linkTxn = await linkToken
    .connect(user)
    .transferAndCall(mainnetVRFCoordinatorAddr, BigInt(value * 1e18), encodedSubId);
  await linkTxn.wait();
4. Deploy a Smart Contract that will request the Random Numbers (consumer contract) {Sample Smart Contract below}
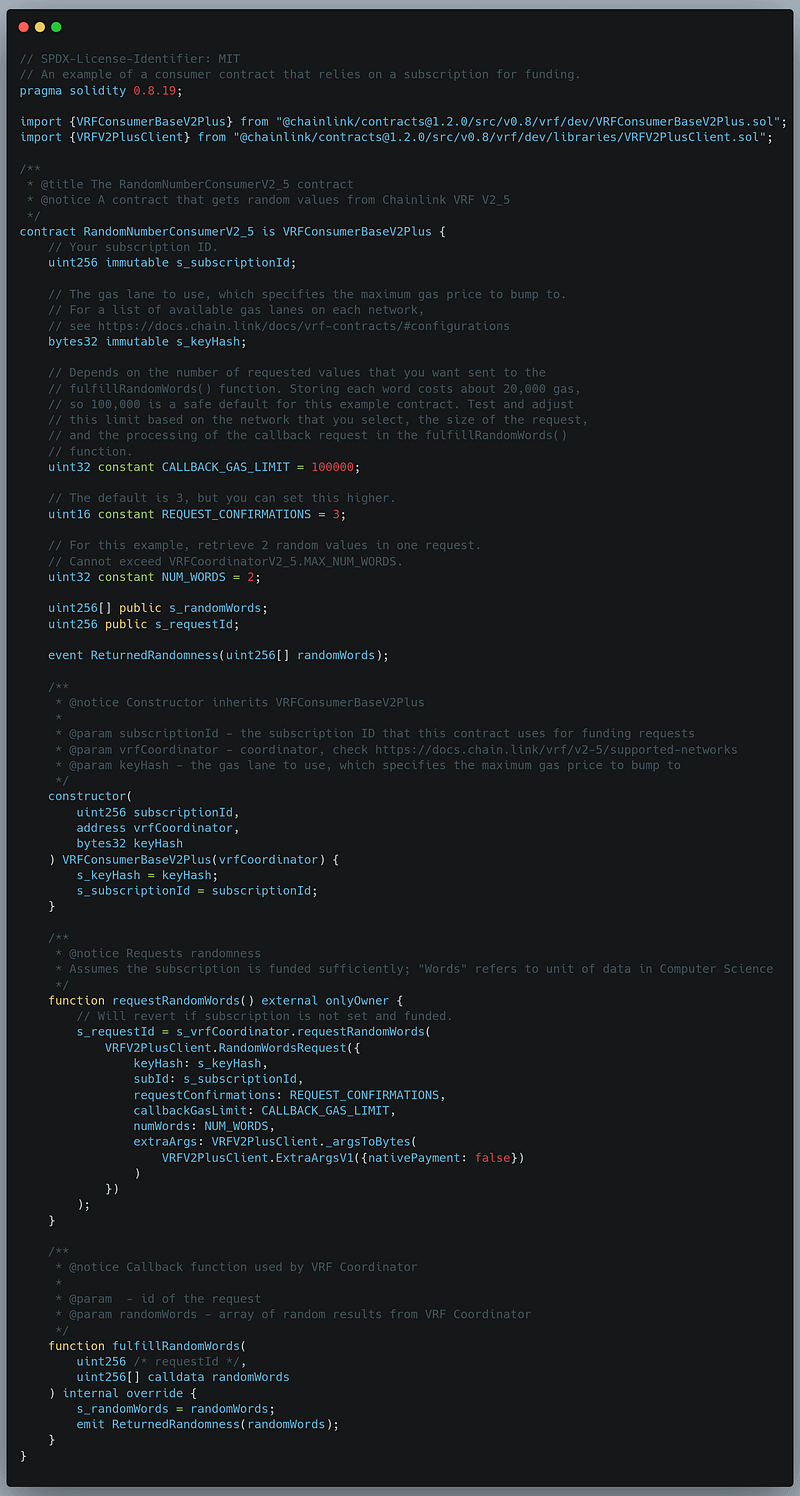
Deploy consumer contracts with the newly created Subscription ID, VRF Coordinator address, and key hash (make sure to change the VRF Coordinator Address and the key hash value according to the network. You can find the list of supported networks, the corresponding values of the VRF Coordinator address, and the key hash here). For the purpose of this tutorial, we will be using the Ethereum Mainnet.
Refer to the complete sample repo and script for requesting and checking random words.
const consumerMock = await ethers.deployContract(
    "RandomNumberConsumerV2_5",
    [
      subId,
      mainnetVRFCoordinatorAddr,  // insert address of the VRF Coordinator based on your network
      "0x787d74caea10b2b357790d5b5247c2f63d1d91572a9846f780606e4d953677ae",
    ],
    user
  );
  await consumerMock.waitForDeployment();
  console.log(`VRF Consumer Mock deployed to ${consumerMock.target}`);
  const consumerAddr = consumerMock.target;
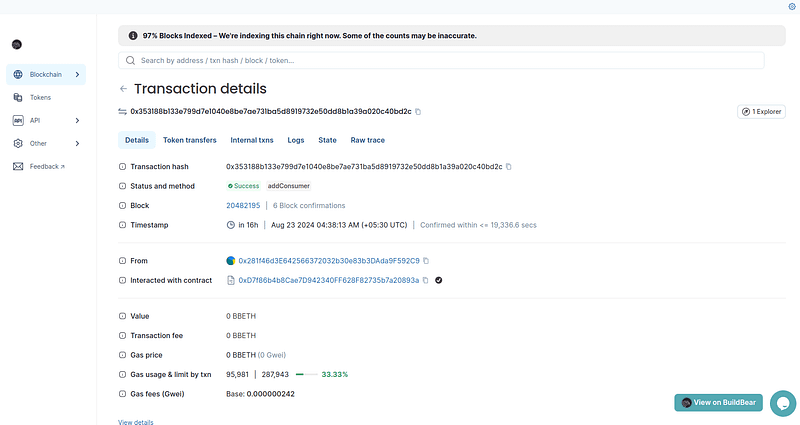
After deploying the consumer contract, the next steps are to add the contract to the coordinator contract, request random words from the consumer contract, and finally fulfill and verify the random words.
Add the Consumer to the Coordinator
This step is crucial to register the consumer contracts to the coordinator for requesting random words.
const addCosumerTx = await updatedCoordinator
    .connect(user)
    .addConsumer(subId, consumerAddr);
  await addCosumerTx.wait();
Request Random Words
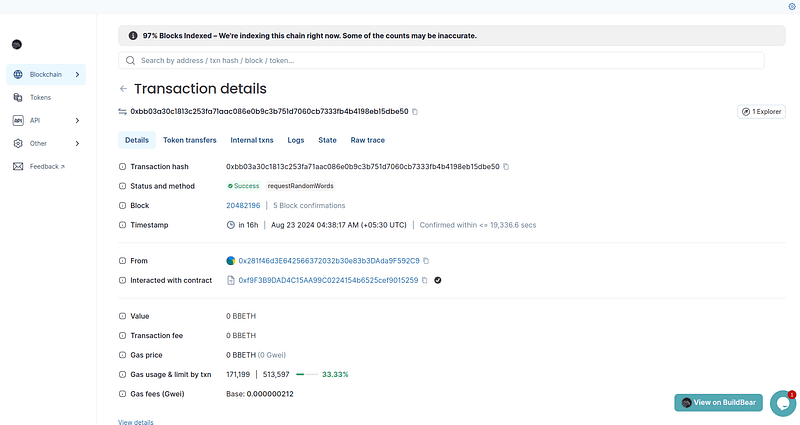
Here we request random numbers from Chainlink VRF by calling the requestRandomWords() function on the consumer contract.
const requestRandomnessTx = await consumerMock
    .connect(user)
    .requestRandomWords();
  await requestRandomnessTx.wait();
  const reqId = await consumerMock.connect(user).s_requestId();
  console.log({ reqId });
Fulfill and Check Random words
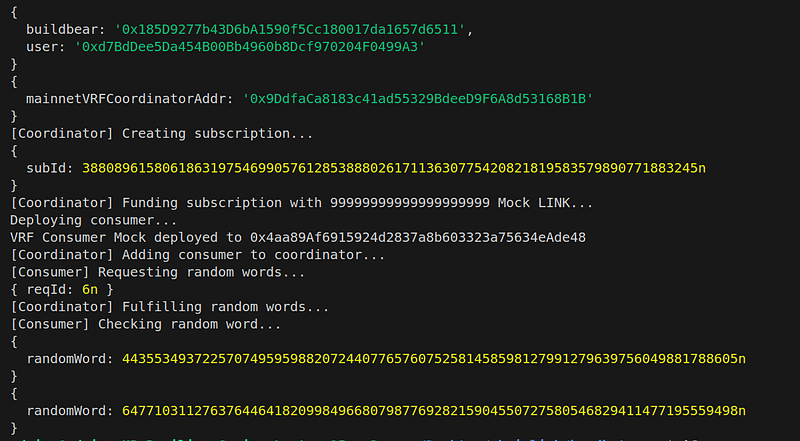
Automatically fulfills random words and retrieves them without any additional steps. Here is the script fetching random words:
// Check random word
  console.log("[Consumer] Checking random word...");
  let randomWord = await consumerMock.connect(user).s_randomWords(0);
  console.log({ randomWord });
  randomWord = await consumerMock.connect(user).s_randomWords(1);
  console.log({ randomWord });
The successful output of the random words is as shown below:
Conclusion
Follow the steps above to easily integrate Chainlink VRF into BuildBear Sandbox for obtaining random words into your contracts. Install the Chainlink plugin to build and test innovative applications on web3 that require randomness before mainnet deployment.
About BuilBear:
BuildBear is a platform tailored for DApp development and testing. Developers gain the freedom to construct a personalized Private Testnet sandbox across a variety of blockchain networks. The liberty to mint unlimited Native and ERC20 tokens, coupled with rapid transaction times on BuildBear (under 3 seconds!), enhances the DApp development lifecycle manifold. The platform comes equipped with tools and plugins designed for real-time testing and debugging, ensuring developers can keep tabs on intricate blockchain transactions with unparalleled ease.
