Uniswap is one of the most popular DeFi protocols for trading digital assets. The evolution of Uniswap from its early version to Uniswap v4 has seen significant changes and improvements. Uniswap v3 introduced concentrated liquidity features that allow liquidity providers to choose price ranges to earn higher fees from their capital. The latest Uniswap v4 has a singleton architecture enhancing liquidity management and flexibility.
This comprehensive guide explores the concept of Hooks and how developers can implement custom Hooks in Uniswap V4.
What are Hooks?
Hooks are smart contracts that facilitate additional features to liquidity pools in Uniswap v4 offering developers with customization capabilities. These features can include dynamic fee adjustments, on-chain limit orders, and integration with on-chain oracles.
How does it work?
It functions similarly to a plugin system, plugging different actions into a pool. This enables developers to deploy pools with custom Hooks that work alongside other Uniswap pools.
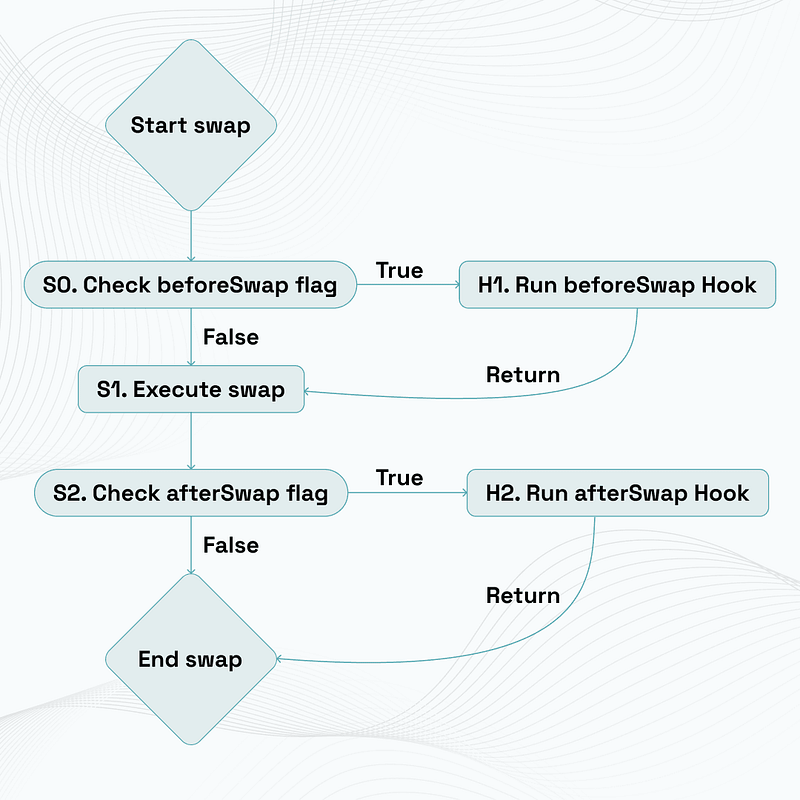
Hooks can be executed before and after major lifecycle actions such as pool creation, liquidity provision, and swapping. Uniswap v4 supports hook callbacks such as:
beforeInitialize and afterInitialize
beforeModifyPosition and afterModifyPosition
beforeSwap and afterSwap
beforeDonate and afterDonate.
before and after swapReturnDelta
after addLiquidityReturnDelta
after removeLiquidityReturnDelta
By leveraging these hooks, developers can introduce unique functionalities and optimizations to the liquidity pools.
Here is a simple illustration of how it works:
Creating a Custom Hook on Uniswap V4
This tutorial will walk you through creating a custom hook for the Uniswap V4 that restricts trading to specific hours of the day. To create a custom Hook in Uniswap V4, we’ll start with a basic template provided by the Uniswap foundation here. Before we begin, make sure you have installed Foundry on your system. Let’s get started!
- Fork and clone the template:
git clone https://github.com/uniswapfoundation/v4-template.git
cd V4-template
- Initialize git and Install dependencies using:
git init
forge install
The above command installs helper contracts such as v4-core and v4-periphery to build hooks.
- Creating a Custom Hook
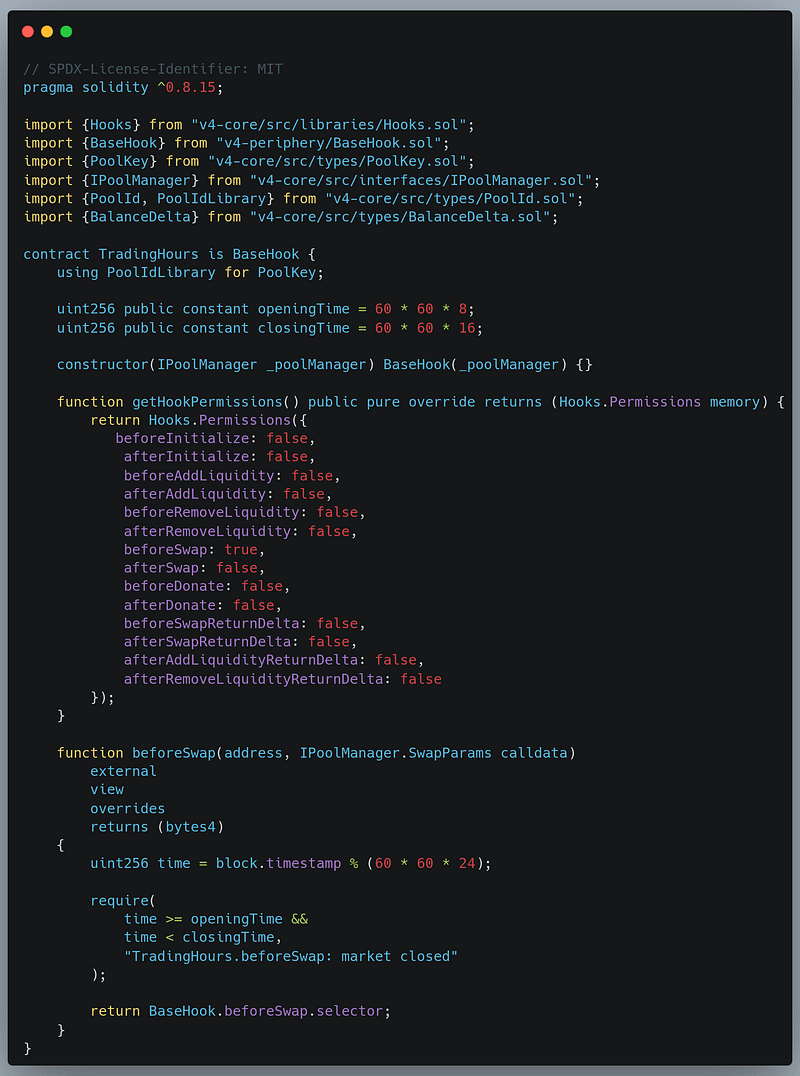
Any hook can be implemented by extending the BaseHook Contract from v4-periphery repository. The getHookPermissions defines which hooks are active. In this case, only the beforeSwap function will be executed during swaps.
Now corresponding to the hook calls we need to implement functionalities. We will specify the trading time with variables openingTime and closingTime. Before any swap happens the hook gets executed with the time-based restriction, ensuring the swap occurs only at specific hours otherwise it will revert the swap transactions. Here is the complete code:
- Deploying Hook
This step is crucial and this is where platforms like BuildBear are important. BuildBear testnets offer advanced testing capabilities to developers with its unique plugin system. You can test the overall functionality of Hooks by deploying into BuildBear Sandbox just as you would on mainnets.
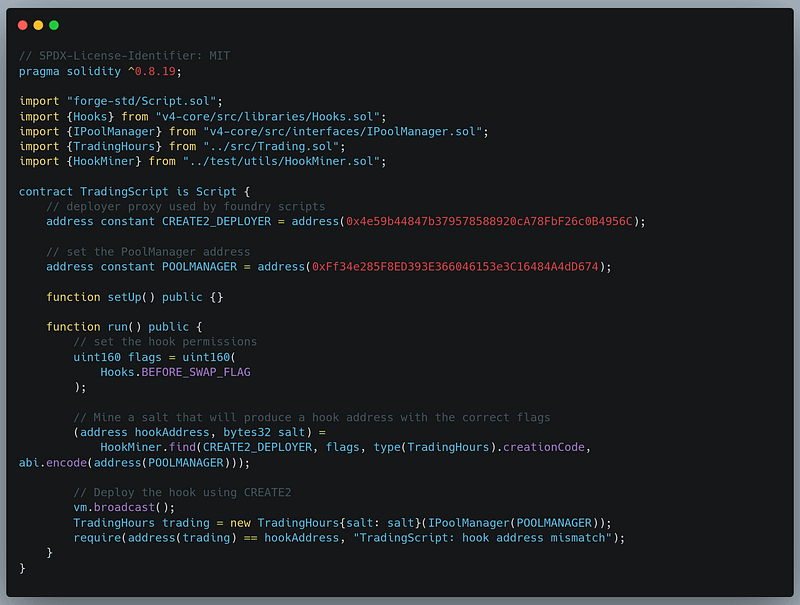
To deploy a Hook contract, we need to use CEATE2 for deploying at a pre-determined address and hook contracts must have specific flags encoded in the address. Set it in the env file as shown here:
# Hook Flags
BEFORE_SWAP=true
AFTER_SWAP=false
BEFORE_ADD_LIQUIDITY=false
AFTER_ADD_LIQUIDITY=false
BEFORE_REMOVE_LIQUIDITY=false
AFTER_REMOVE_LIQUIDITY=false
BEFORE_INITIALIZE=false
AFTER_INITIALIZE=false
BEFORE_DONATE=false
AFTER_DONATE=false
The deploy script to deploy the Hook as shown below:
- Create a BuildBear Sandbox to deploy and verify contracts.
If you are a novice to BuildBear check this quick guide. Here we will deploy it on the Sepolia network, refer to the deployed address of poolManager here.
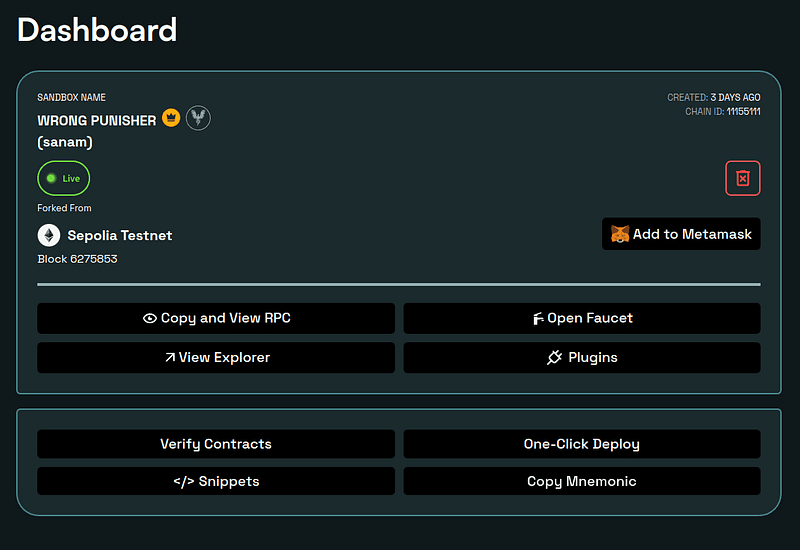
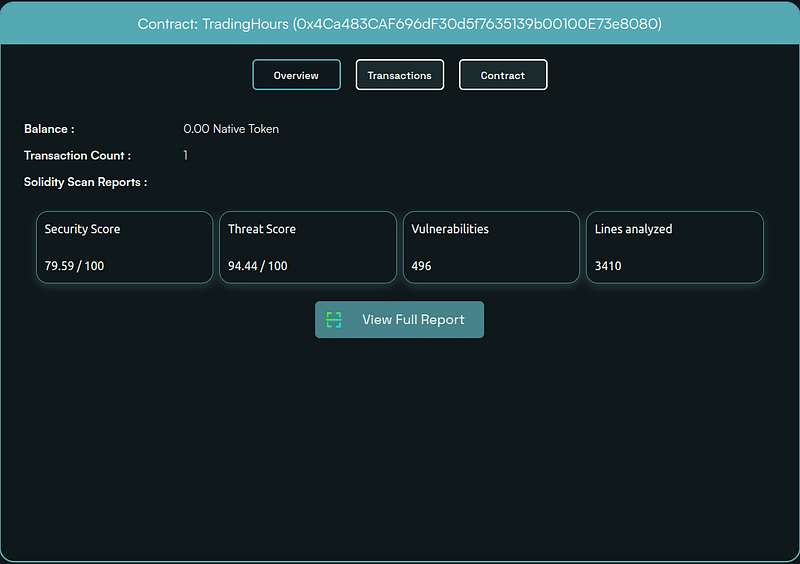
From the Plugin options on your BuildBear Dashboard, install the SolidityScan plugin to check for vulnerabilities and get a detailed security report.
The Sourcify plugin is installed by default and will be used for smart contract verification.
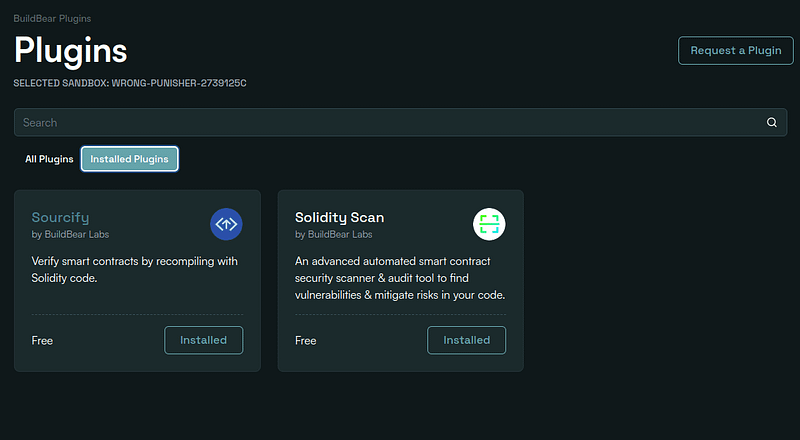
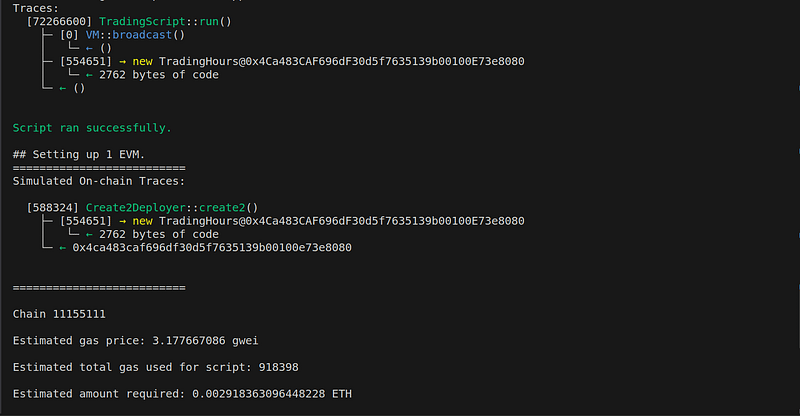
Use the following command to deploy and verify your Hook contract. Ensure you replace the placeholders with your actual BuildBear RPC URL and private key. Also, make sure you have enough tokens in your account or get them from the faucet.
forge script script/DeployHook.s.sol --rpc-url https://rpc.buildbear.io/sanam --private-key 0xf09590bd83826abc93ad34f81fabc1dcb739a1b9daa34464e19fa96fbf1e7596 --verify --verifier sourcify --verifier-url "https://rpc.buildbear.io/verify/sourcify/server/sanam" -vvvv --broadcast --slow
Navigate to Explorer to see the security status and vulnerabilities count of your Hook in the overview tab, as shown in the images below:
Conclusion
Uniswap v4 advances the DeFi space by optimizing liquidity management and trading functionalities. The new Hooks feature offers customizability and enhanced capability, greatly benefiting decentralized exchanges (DEX) and automated market makers (AMM). This tutorial demonstrates how to develop and deploy custom Hooks on Uniswap v4 using BuildBear, highlighting the seamless integration and powerful features that make it easier for developers to create, test, and secure smart contracts.
About BuilBear:
BuildBear is a platform tailored for DApp development and testing. Developers gain the freedom to construct a personalized Private Testnet sandbox across a variety of blockchain networks. The liberty to mint unlimited Native and ERC20 tokens, coupled with rapid transaction times on BuildBear (under 3 seconds!), enhances the DApp development lifecycle manifold. The platform comes equipped with tools and plugins designed for real-time testing and debugging, ensuring developers can keep tabs on intricate blockchain transactions with unparalleled ease.
