Learn, code and deploy your own MultiSig Wallet and test it with your friends now
What is a MultiSig Wallet?
A digital wallet that uses multiple signatures is known as a multisig wallet. This indicates that multiple private keys are required to sign and approve a cryptographic transaction.
Applications of a MultiSig Wallet
In simple terms a MultiSig wallet can be understood as a box with more than 1 lock and each lock having a unique key, and it can be opened only when all the locks or a certain number of locks are unlocked. For example, a bank safety box, where 1 key is with you and 1 with the bank, when both keys are used, only then can the box be opened.
There are 2 types of MultiSig wallets:
nofntype: In this type if there arenunique keys then we need all thenkeys to access the wallet, examples are 2 of 2, 3 of 3 type of MultiSig wallet. While being very secure it possesses a big risk too, if any one key is lost then access to the entire wallet is lost.nofmtype: This is a more accessible type of wallet, where if there are a total ofmunique keys for a wallet you only neednkeys to access it, wheren<m. usually it is of the form 2-of-3 or 3-of-4, such that a majority is required to access the wallet. This is secure and even when you lose a key, you don't lose access to the entire wallet.
Now let’s start with creating our own MultiSig Wallet and test it out!
(A) Local Set-up
You can clone the tutorials repo from here: Github and then progress to the multisig folder
(B) Installation
Once the code is set-up on your local system, you need to make sure you must install all the dependencies using npm i or yarn install depending on your personal preference.
(C) Understanding the Structure of Multisig Wallet
(C1) Constructor of multisig.sol
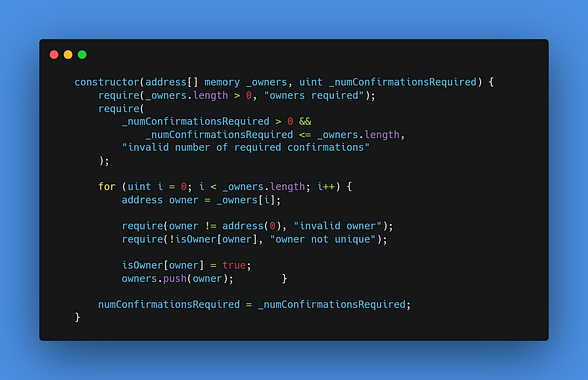
The constructor for this contract takes 2 parameters:
(a) List of owners and
(b) Minimum number of approvals required for any transaction to be executed.
(C2) Creating and Approving a transaction
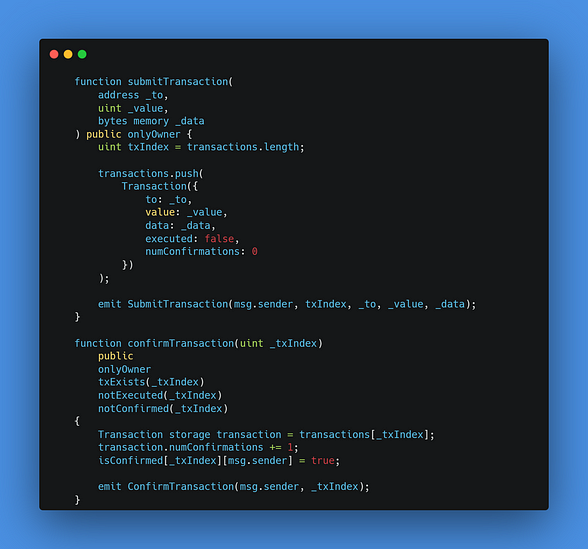
In a multisig wallet, it is important that the required number of owners approve a transaction before it is executed. Anyone can create and submit a transaction to the owners, requesting their approval. This is done using the submitTransaction function. It generates a transaction index which can then be used to refer to the transaction in the future.
Now the owners can use this transaction index and approve the transaction using the confirmTransaction function. If the required number of owners approve then only it will be executed, else we will wait till it is approved by others.
(C3) Executing the transactions
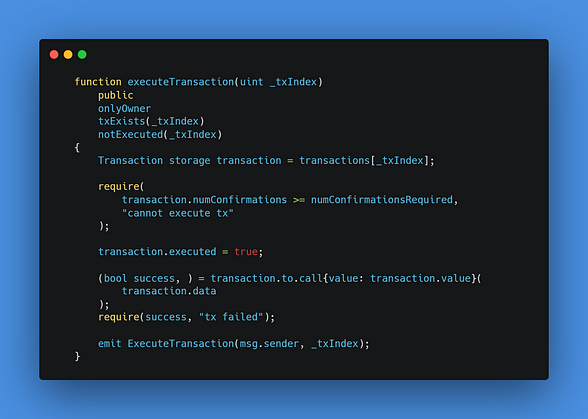
Finally, once the transaction is created and approved by the required number of owners, it can be executed by the owner that deployed the contract. For it to be executed, we first need to check if it is previously not executed so as to repeat double transfers and also that if the transaction has been approved by owners or not, if not then it will raise an error. Once executed the transaction is marked executed and the event is called.
I hope the structure of the contract is now clear to you, in case of any queries feel free to reach out to me in the comments. It’s time to see your contract in action!
(D) Deploying the Smart Contract: multisig.sol
To deploy and for the purposes of our demo, we will be deploying the smart contract on BuildBear → buildbear.io
Creating a Private Testnet on BuildBear 🐻❄️ (why BuildBear, you ask? Have a look over here: Where Localhost Fails and Win Web3 Hackathons, using BuildBear Testnet’s Analytics)
We have secured our RPC from BuildBear and have updated our .env file for the RPC endpoint.
We have updated our hardhat.config.js to the following:
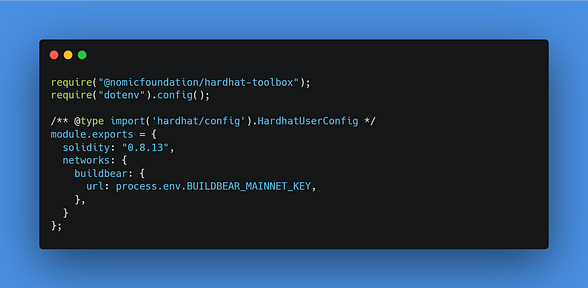
To deploy your smart contract run the command npx hardhat run scripts/deploy.js --network buildbear
Once you have run the above command, the smart contract should have been deployed and your terminal will provide you with the address on which the smart contract has been deployed, as following:

(E) Interacting with our Smart Contract
💡 BONUS, you can interact with mine, thanks to BuildBear!!! (More on the benefits on BuildBear here, here and here)
Copy the address that is produced and then go to your private version of the BuildBear Explorer. You can visit mine at BuildBear | Explorer. My contract was deployed at 0x322813Fd9A801c5507c9de605d63CEA4f2CE6c44 and hence my contract is available at here.
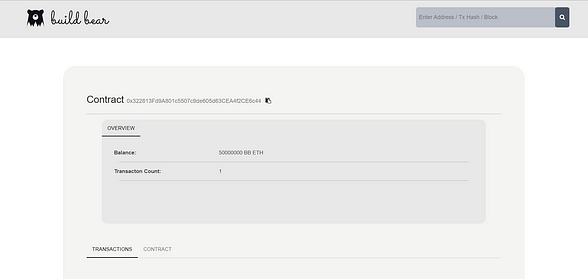
Now, it’s time we make some use of this multisig wallet. For that go to the contracts tab on the above-mentioned page, over there you will see the option of Read Contract and Write Contract. You can start by viewing the details of the contract from the Read Contract part, such as the owners of the contract, or the number of transactions submitted, etc. Initially there are 0 transactions and I have added 3 of my test wallets as owners of the contract.
Let’s submit a transaction. I will be transferring 5 BB Eth to one of my test wallets(0x07E2E295d73Bba059A4002f02803eaA7eF285b74).

For this transaction to be executed, it needs to be approved by at least 2 owners of the wallet. As it is the first transaction, the transaction index for this is 0, we will use this index to interact with the contract in the next steps.
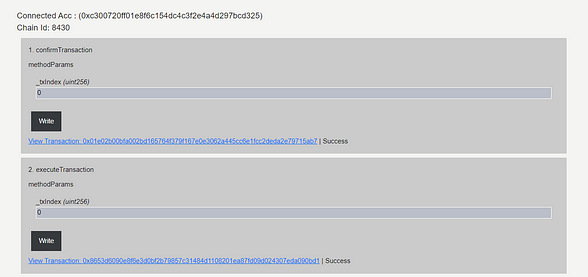
Once the transaction has been approved, we have to execute using the same transaction index. You can check the execute transaction using the following hash: 0x8653d6090e8f6e3d0bf2b79857c31484d1108201ea87fd09d024307eda090bd1 on the BuildBear explorer or use this link.
One of the cool things where BuildBear helps is understanding what happens inside the transaction
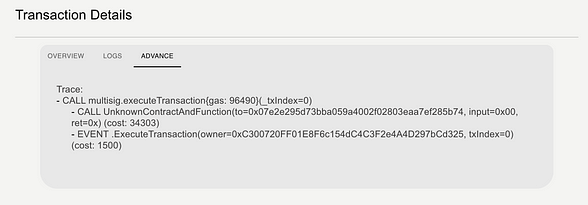
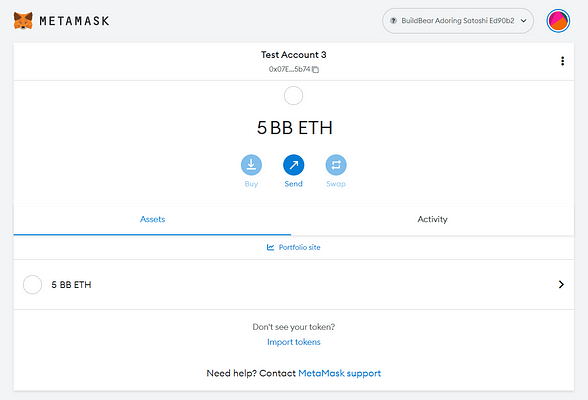
As you can see, the 5 BB Eth are now transferred to the test account. This could not have happened if we did not provide 2 approvals as required by the wallet.
With this we come to the end of the MultiSig Wallet Article.
With BuildBear I was able to share my transactions with you and allow anyone, including you to interact with the contract. Yes, you can actually propose a transaction in my contract listed over here → https://explorer.buildbear.io/node/adoring-satoshi-ed90b2/address/0x322813Fd9A801c5507c9de605d63CEA4f2CE6c44/writeContract
Use my private faucet over here to get as many native coins you need and please do not hestitate to send me a transaction → https://faucet.buildbear.io/adoring-satoshi-ed90b2
BuildBear provides you with a private test node, making the testing process smooth and efficient. I hope you were also able to follow the tutorial and build your own MultiSig Wallet.
In case you face any difficulties while implementing the smart contract, let us know in the comments and we will help you in figuring it out. For any other feedback or suggestions please feel free to reach me in the comments section.
To learn more about BuildBear, read here docs
Get the above Github code from here
If you appreciate what we are doing, please follow us on Twitter and Join the Telegram group if you haven’t done yet.
And please give us a clap 👏 if you like our work and please do share this article.
Thank you.
Author: Shivam (Twitter || LinkedIn)
