


Decentralized lending protocols allow users to lend and borrow cryptocurrencies directly on the blockchain through smart contracts, without the need for intermediaries such as banks. In this tutorial, you will learn how to build your own decentralized lending protocol from scratch using Solidity.
By the end of this tutorial, you will have a solid understanding of the fundamental principles behind decentralized lending protocols, including how to add liquidity, borrow funds, and repay loans. You will also gain hands-on experience in writing and deploying smart contracts on the Ethereum blockchain.
Let’s get started!
Prerequisites
Before getting started, please ensure that you have the following prerequisites installed on your system:
Getting Started
To begin, navigate to the scaffold-eth x BuildBear repository.
Here’s why we recommend using scaffold-eth x BuildBear:
It allows you to easily fork EVM-compatible chains (such as Ethereum, Polygon, Binance Smart Chain, Fantom, Optimism, and Arbitrum Mainnet) directly from the CLI. Saving you valuable time that would otherwise be spent searching for working RPCs.
You can mint native and ERC20 tokens effortlessly using the CLI, eliminating the need to waste time searching for functional faucets.
To get started, click on the “Fork” button to create a copy of the repository on your own GitHub account. Please wait for the forking process to complete before proceeding.
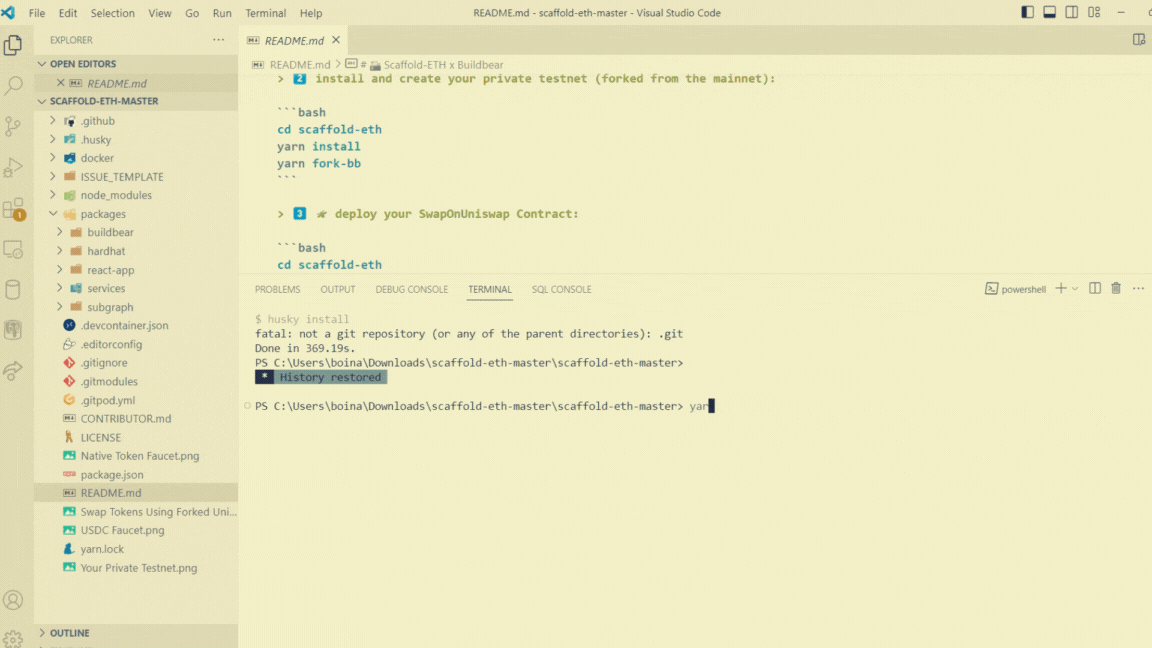
Next, open a terminal and clone the forked repository, which includes all the necessary components for building a decentralized application:
git clone <paste the URL you fork repo>
cd scaffold-eth
To install all the required packages, execute the following command:
yarn install
To fork the Mainnet, use the following command: Choose your desired blockchain and enter the block number from which you wish to fork. Alternatively, you can leave the default value as is.
yarn fork-bb
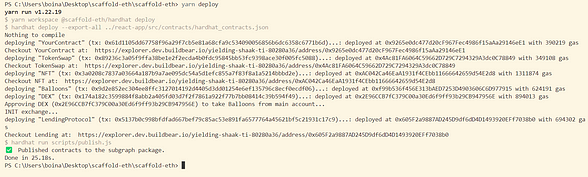
Deploying the contracts
yarn deploy
Starting the frontend
yarn start
Once the application is running, you can access it at localhost:3000 and you should see the following:
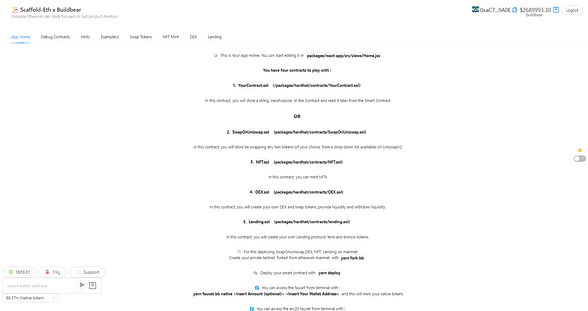
Before diving deeper into the smart contract, let’s start by exploring the functionalities of Lending. To begin, navigate to the Lending page.
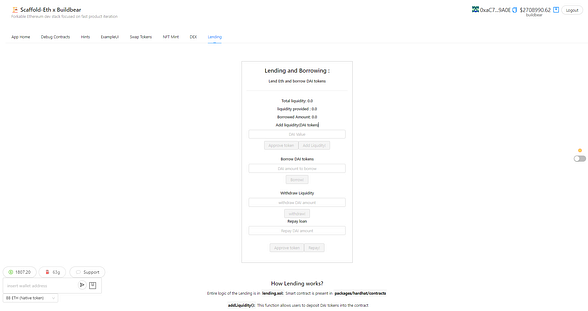
To claim free ETH, Connect your wallet and Click on grab funds from the faucet.

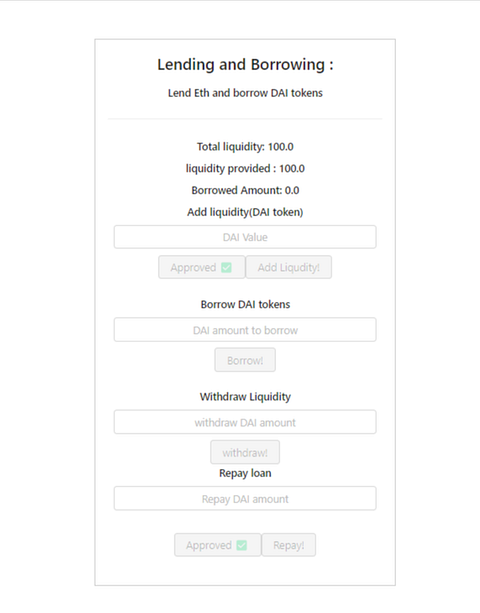
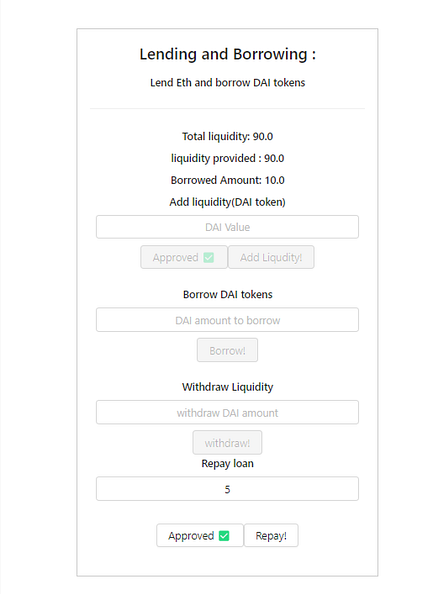
Adding liquidity
Enter the desired token amount.
Once you’ve entered the token amount, click on approve token and then proceed with the Adding liquidity
Approve the transaction on Metamask: A Metamask prompt will appear, requesting your approval. The Total Liquidity and liquidity provided will be updated.
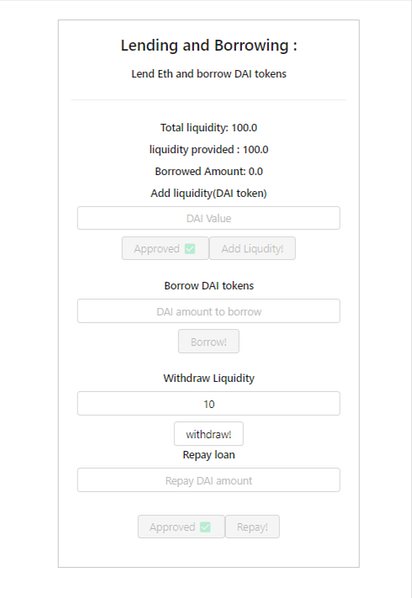
Withdraw liquidity
Enter the amount you want to withdraw.
Once you’ve entered the token amount, click on Withdraw!
Approve the transaction on Metamask: A Metamask prompt will appear, requesting your approval. The Total Liquidity and liquidity provided will be updated.
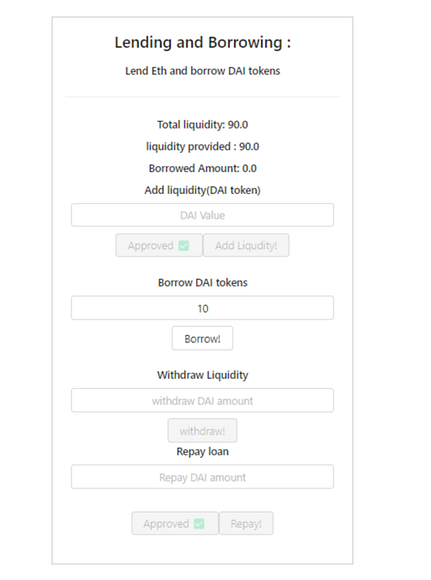
Borrow liquidity
Enter the amount you want to borrow.
Once you’ve entered the token amount, click on Borrow!
Approve the transaction on Metamask: A Metamask prompt will appear, requesting your approval. The Total Liquidity, the liquidity provided, and borrowed Amount will be updated.
Repay Loan
Enter the amount you want to Repay.
Once you’ve entered the token amount, click on Repay!
Approve the transaction on Metamask: A Metamask prompt will appear, requesting your approval. The Total Liquidity, the liquidity provided, and borrowed Amount will be updated.
Let’s dive deep into the Smart contract
We can find lending.sol contract in packages/hardhat/contracts:
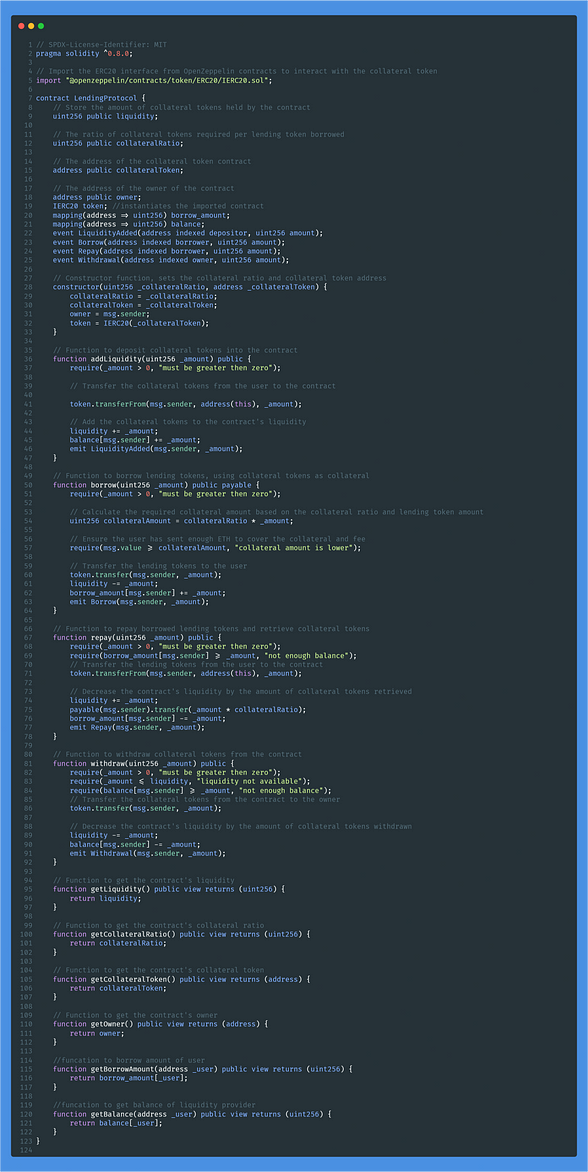
The contract uses the Solidity version pragma ^
0.8.0and is licensed under the MIT license.The contract imports one external contract:
IERC20.solfrom the OpenZeppelin library. These contracts provide standardized ERC20 token functionality.addLiquidity(uint256 _amount): This function allows users to deposit collateral tokens into the contract. The_amountparameter specifies the number of collateral tokens to deposit. The function first transfers the collateral tokens from the user to the contract and then adds the collateral tokens to the contract's liquidity. This function emits theLiquidityAddedevent.borrow(uint256 _amount): This function allows users to borrow lending tokens from the contract using their deposited collateral tokens as collateral. The_amountparameter specifies the number of lending tokens to borrow. The function first calculates the required collateral amount based on the collateral ratio and lending token amount, and then ensures that the user has sent enough ETH to cover the collateral and fee. The function then transfers the lending tokens to the user and updates the borrow amount for that user. This function emits theBorrowevent.repay(uint256 _amount): This function allows users to repay borrowed lending tokens and retrieve their collateral tokens. The_amountparameter specifies the number of lending tokens to repay. The function first transfers the lending tokens from the user to the contract, and then decreases the contract's liquidity by the amount of collateral tokens that the user should retrieve. Finally, the function transfers the collateral tokens from the contract to the user. This function emits theRepayevent.withdraw(uint256 _amount): This function allows users to withdraw their deposited collateral tokens from the contract. The_amountparameter specifies the number of collateral tokens to withdraw. The function first checks that the requested amount is available in the contract and that the user has enough balance, then transfers the collateral tokens from the contract to the user, and finally decreases the contract's liquidity by the amount of collateral tokens that were withdrawn. This function emits theWithdrawalevent.getLiquidity(): This function returns the current amount of collateral tokens held by the contract.getCollateralRatio(): This function returns the current collateral ratio required by the contract, which is the amount of collateral tokens required per lending token borrowed.getCollateralToken(): This function returns the address of the collateral token contract used by the contract.getOwner(): This function returns the address of the owner of the contract.getBorrowAmount(address _user): This function returns the current amount of lending tokens borrowed by the specified_user.getBalance(address _user): This function returns the current balance of collateral tokens deposited by the specified_user.
Congratulations
We have successfully developed a basic lending protocol that enables users to perform lending and borrowing.
Share your project on Twitter and LinkedIn and tag BuildBear.
If you appreciate what we are doing, please follow us on Twitter, and LinkedIn and Join the Telegram group if you haven’t done yet.
And please give us a clap 👏 if you like our work.
Github Repo : Buildbear Tutorials
About BuildBear:
BuildBear is a platform for testing dApps at scale, for teams. It provides users with their own private Testnet to test their smart contracts and dApps, which can be forked from any EVM chain. It also provides a Faucet, Explorer, and RPC for testing purposes.
BuildBear aims to build an ecosystem of tools for testing dApps at scale for the teams.
Create your Private Testnet Now with BuildBear